Schools today use more apps, more devices, and more online accounts than ever. That is great for learning, but it also opens many doors for risk. A single weak password, one missed update, or one “free” classroom app with poor privacy rules can cause real harm. Parents worry about identity theft and data leaks. Teachers worry about class time being lost to tech trouble. Leaders worry about ransomware and public trust.
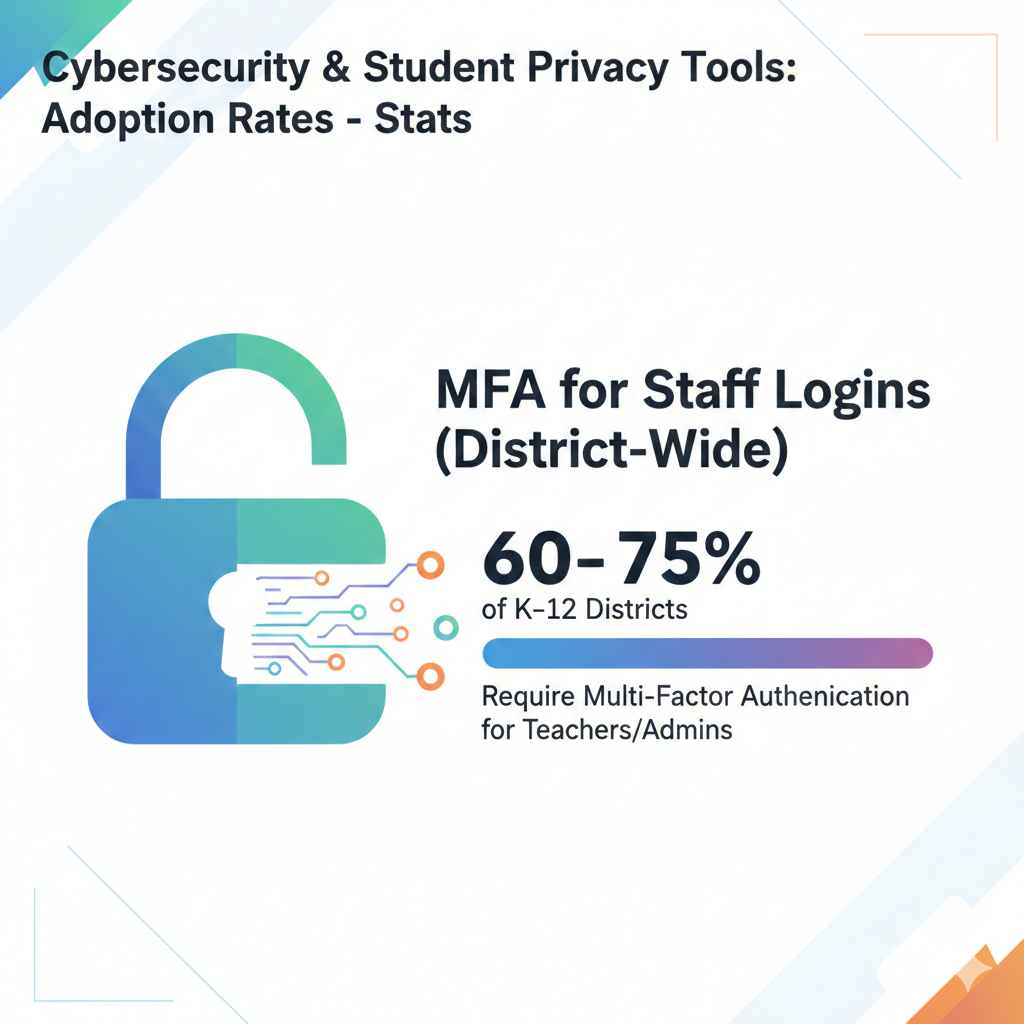
1) MFA for staff logins (district-wide): Estimated ~60–75% of K–12 districts require multi-factor authentication for teachers/admins
What this stat really means
Multi-factor authentication (MFA) is the extra proof step after a password. It might be a code from an app, a tap to approve, or a one-time code. When around 60–75% of districts require MFA for staff, it shows one big truth: schools now know that passwords alone are easy to steal.
Staff accounts are the keys to the whole building. Staff email can reset other accounts. Admin tools can change grades, alter student files, or push software to every device. So attackers aim at teachers, office staff, and leaders first.
How to act on it in a simple, practical way
Start by turning on MFA for the “top five” systems staff use every day: email, the student information system, the learning system, the cloud drive, and the device management portal. If you try to do everything at once, you will get pushback and delays. If you protect the top five first, you cut the biggest risk fast.
Choose an MFA method that staff will actually use. An authenticator app is often the best balance of ease and safety. Text messages are better than nothing, but they can be less safe. If your staff feel nervous about apps, run a short guided setup in a staff meeting, then offer a calm one-on-one help option.
Plan for the “lost phone” moment before it happens. Give staff backup codes or a second method. Make sure the help desk can reset MFA quickly but safely, with clear identity checks. Finally, teach one rule that stops many attacks: if you get an MFA prompt you did not start, deny it and report it.
That single habit blocks a common trick where attackers spam approvals until someone taps yes.
2) MFA for student logins: Estimated only ~15–30% of K–12 schools require MFA for students
Why student MFA adoption is lower
Student MFA is harder because student life is messy. Devices are shared in some grades. Kids forget passwords. Some families do not want phone-based steps. And teachers cannot spend ten minutes of class time fixing logins.
That is why only about 15–30% of schools require MFA for students, and most of those schools start with older grades.
How to raise safety without making learning slower
The best move is to use “smart MFA” instead of “MFA every time.” Keep normal logins simple on school-managed devices that are already checked and controlled. Then require MFA only when the login looks risky, like a new device, a new location, or too many failed password tries.
This reduces classroom friction while still blocking real attacks.
For younger students, consider safer alternatives to phone-based MFA. Picture passwords, short PINs on managed devices, or passkeys tied to the device can reduce stolen-password risk without adding a phone step.
For older students, an authenticator app can work if you provide clear support and a simple reset process.
Also focus on the basics that make student MFA more possible. Use single sign-on so students log in once, not ten times. Enforce stronger password rules that are still easy to remember, like longer passphrases instead of complex symbols.
Make account recovery safe. If anyone can reset a student password with only a name, that is an open door.
If you are a school leader, roll it out by grade bands. Start with high school accounts that connect to email, cloud storage, and personal portfolios. Measure help tickets for two weeks, fix the pain points, then expand. The goal is simple: better protection, with less lost learning time.
3) Single Sign-On (SSO) for learning apps: Estimated ~50–70% of schools use SSO so students can access multiple tools with one login
What SSO changes for safety and privacy
SSO means one trusted login unlocks many approved tools. When about 50–70% of schools use SSO, it shows that many are trying to solve a real problem: too many passwords create weak habits. Students reuse passwords.
Teachers write passwords on sticky notes. Reset requests explode. SSO reduces all of that. It also helps privacy because the school can control which apps get access, and it can shut off access fast when a student leaves.
How to make SSO work well in real classrooms
SSO only helps if it is done cleanly. First, connect SSO to a strong identity system, then protect that “one login” with better rules, like stronger passwords and MFA for staff who can change access. Second, limit apps to the least access they need.
If an app only needs a student name and class, do not give it email, birthdate, or full student ID.
Next, use SSO to cut down “shadow apps,” meaning tools used without approval. Teachers often pick a tool because it is fast. If the approved tools are easy to find and easy to log into with one click, teachers are less likely to bring in risky apps.

Create a simple staff page where approved apps sit in one place, already linked to SSO.
Finally, set a schedule to review SSO connections. Remove old apps that no one uses. Check for apps that changed ownership or updated privacy terms. Make sure the offboarding process works: when a student moves schools, their access should end the same day.
Done right, SSO is not just a convenience tool. It becomes your control center for safer, simpler digital learning.
4) Central “app roster” or app catalog: Estimated ~40–60% of districts maintain an official list of approved digital tools that teachers can use with students
What an app roster solves
A central app roster is a simple idea: one official list of tools that the school or district approves for student use.
If about 40–60% of districts keep this kind of catalog, that means many schools still rely on informal sharing, like “another teacher told me this app is good.” That is how risky tools slip in. Even well-meaning apps can collect too much data, keep it too long, or share it in ways families would not expect.
An app roster is not about saying “no” to teachers. It is about saying “yes” in a safer way. It gives teachers confidence that the tools on the list are checked, supported, and ready for class.
How to build a roster teachers will actually use
Start by making the roster easy to find. Put it on the staff portal or inside the LMS where teachers already click every day.
If it lives in a hidden folder, it will be ignored. Next, keep it simple. For each app, show only what teachers care about: what it is for, which grades it fits, what student data it uses in plain words, and how to log in. If you add long legal text, people will stop reading.
Then set a clear, friendly path for new app requests. Teachers should be able to submit a request in two minutes. Ask for the app name, the learning goal, and the type of student data it needs. Promise a fast first reply, even if the full review takes longer. The biggest reason teachers bypass approval is silence.
Also give “levels” of approval. Some apps may be allowed for teacher use only. Some may be allowed for student accounts without names, like anonymous class codes. Others may be fully approved with student names and class rosters. This lets teachers move quickly while still protecting privacy.
Finally, review the roster twice a year. Remove tools no one uses. Flag apps that changed terms. Keep the list alive. A roster that never updates becomes a museum, not a safety tool.
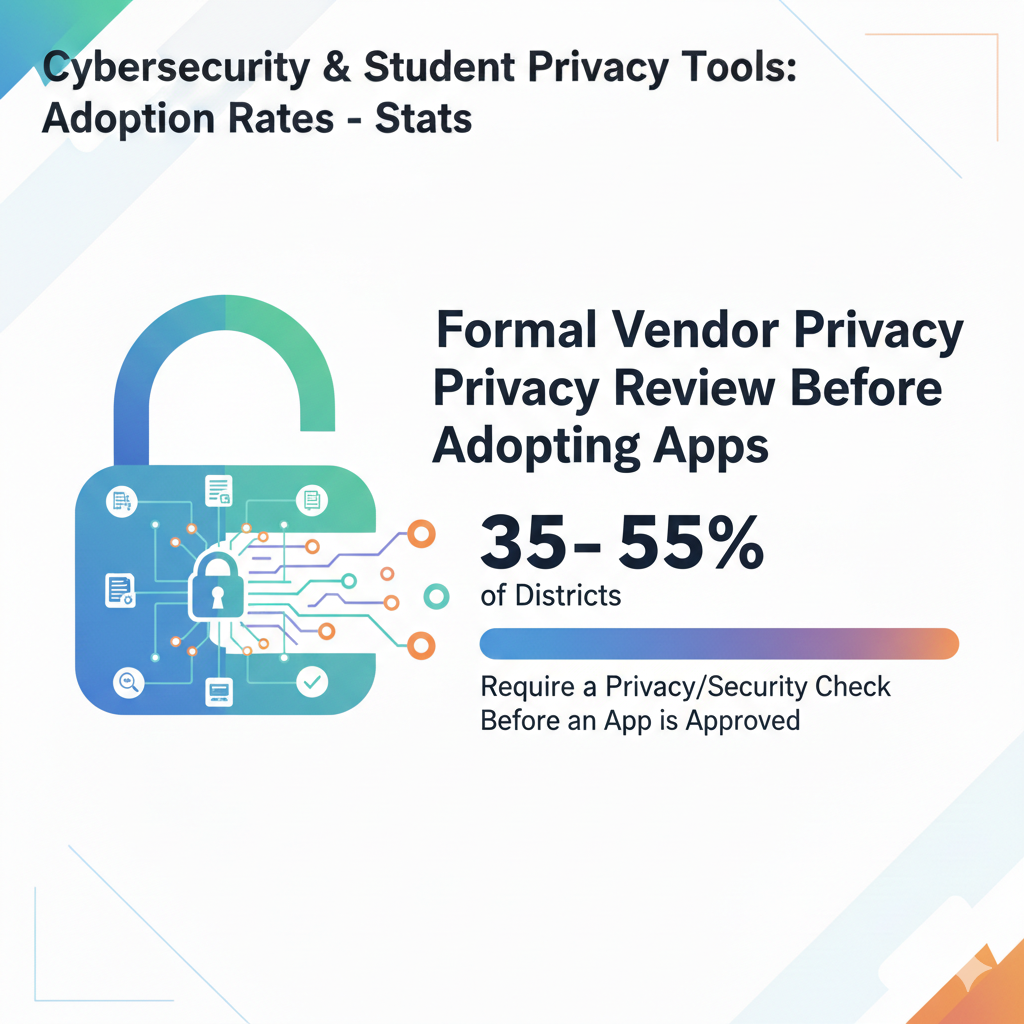
5) Formal vendor privacy review before adopting apps: Estimated ~35–55% of districts require a privacy/security check before an app is approved
Why a vendor review matters more than “good reviews”
A formal vendor privacy review is where the school checks what data the app collects, why it collects it, how it stores it, and who it shares it with. If only about 35–55% of districts require this review, many schools are still trusting marketing pages and star ratings. That is risky. An app can look great for learning and still be careless with student data.
A privacy review is also about long-term safety. If a vendor gets bought by another company, data rules can change. If an app has a breach, the school needs to know what data was at risk. You cannot manage what you never checked.
A simple review process that does not overwhelm your team
Keep the first review short and focused. Ask five questions in plain language. What student data is collected? Is it needed for the lesson? How long is it kept? Is it shared or sold? Can the school delete it on request? If a vendor cannot answer these clearly, that is a warning sign.
Next, check security basics. Does the app support SSO? Does it encrypt data in transit and at rest? Does it offer admin controls and audit logs? You do not need perfect answers, but you do need honest ones. Vendors that avoid these questions often create future problems.
Also look at classroom reality. If the app needs students to create personal accounts with emails, that may not fit younger grades. If it asks for full names and birthdays, push back. Many tools can run with less data, like first name plus a class code.
If your district is small, do not try to review everything alone. Reuse approved templates, share reviews across schools, and create a repeatable checklist. The goal is not fancy paperwork. The goal is fewer surprises, fewer leaks, and fewer parent concerns.
6) Signed Data Processing Agreement (DPA) for most new apps: Estimated ~30–50% of districts routinely require DPAs that limit how vendors use student data
What a DPA does in plain terms
A DPA is a contract that sets rules for student data. It can say the vendor cannot sell data, cannot use it for ads, must notify the school if there is a breach, and must delete data when the school asks.
If only about 30–50% of districts routinely require DPAs, that means many schools still rely on standard “terms of service” written to protect the vendor, not the student.
A DPA is one of the strongest tools a school has, because it turns expectations into enforceable promises.
How to use DPAs without slowing learning down
Start by using a standard DPA template that your legal team or district can reuse. The problem is not signing DPAs. The problem is reinventing them for every app. A standard template speeds everything up.
Then decide which apps require a DPA. A good rule is simple: if students must log in, or if the app receives student names, work samples, grades, or messages, require a DPA. If the tool is truly anonymous and collects no personal data, the DPA need may be lighter, but you should still confirm that anonymity is real.
Make sure the DPA includes deletion and data return terms. Schools often forget this. If you stop using an app, you should be able to export student work and then delete the stored data. Also include clear breach notice timelines. “We will notify you promptly” is vague. Ask for a specific window.
Finally, keep DPAs organized. Store them in one searchable place. Link each DPA to the app roster. That way teachers, families, and admins can see that the tool is not only useful, but also governed by clear privacy rules.
7) Device Management (MDM) on school-issued devices: Estimated ~70–90% of 1:1 device programs use MDM to push settings, apps, and security updates
Why MDM is the backbone of device safety
MDM is the tool that lets a school manage thousands of devices from one place. It can set rules, install apps, block risky settings, and push updates.
If around 70–90% of 1:1 programs use MDM, that shows most schools understand a key point: a device you cannot control becomes a problem fast. Without MDM, a lost device may keep access to student accounts. A student might turn off basic protections. A teacher device could miss updates for months.
MDM also helps privacy. It can limit what apps can do, stop random extensions, and control what data leaves the device.
Action steps that make MDM actually work
First, build “profiles” by role and grade. A kindergarten iPad should not have the same freedoms as a staff laptop. High school devices may need more tools, but they also need stronger monitoring and safer browsing rules. Keep each profile clear, so changes do not break learning.

Second, lock the settings that matter most. Disable unknown app installs where possible. Block risky browser extensions. Require screen locks on staff devices. Turn on disk encryption if your device type supports it. These choices reduce the chance that a stolen device becomes a student-data leak.
Third, use MDM to keep software current. Set a weekly update window and a clear deadline. If a device misses updates, put it in a limited mode until it catches up. Do this gently, with clear messages, so it feels like a safety step, not a punishment.
Finally, plan for loss and theft. Make sure remote lock and remote wipe work. Test it on a few devices every term. Have a simple form for families to report a missing device fast. The goal is speed. The faster you lock it, the less risk you carry.
8) Web content filtering on student devices (on-campus): Estimated ~85–95% of schools use filtering to block unsafe sites and malware sources on school networks
What filtering should do (and what it should not do)
Web filtering is common for a reason. If 85–95% of schools filter on campus, it shows near-universal agreement that students should not stumble into unsafe content, scam sites, or malware. Filtering can also cut phishing risk by blocking known bad domains.
But filtering can be misused. If it blocks too much, learning suffers. If it blocks too little, it becomes a false comfort. The best filtering protects safety while still allowing real research and creative work.
How to tune filtering for real learning
Start with category-based blocks for clear harm: adult content, gambling, known malware, and phishing. Then build a fast, human unblock process. Teachers need a way to request access during class without waiting days. A simple “request unblock” button that routes to IT can save hours of frustration.
Next, use age-based policies. Younger grades need tighter guardrails. Older students need more access for research, but with better monitoring for threats. Try not to use one filter level for every grade.
Also watch for privacy. Some filters collect browsing data. Set clear limits on who can see it and how long it is kept. Tell families what is logged. Transparency builds trust.
Finally, test your filter like a student would. Try searching common class topics. See what breaks. If history research pages get blocked, fix it. A filter that blocks learning pushes teachers to work around it, and workarounds create new risks.
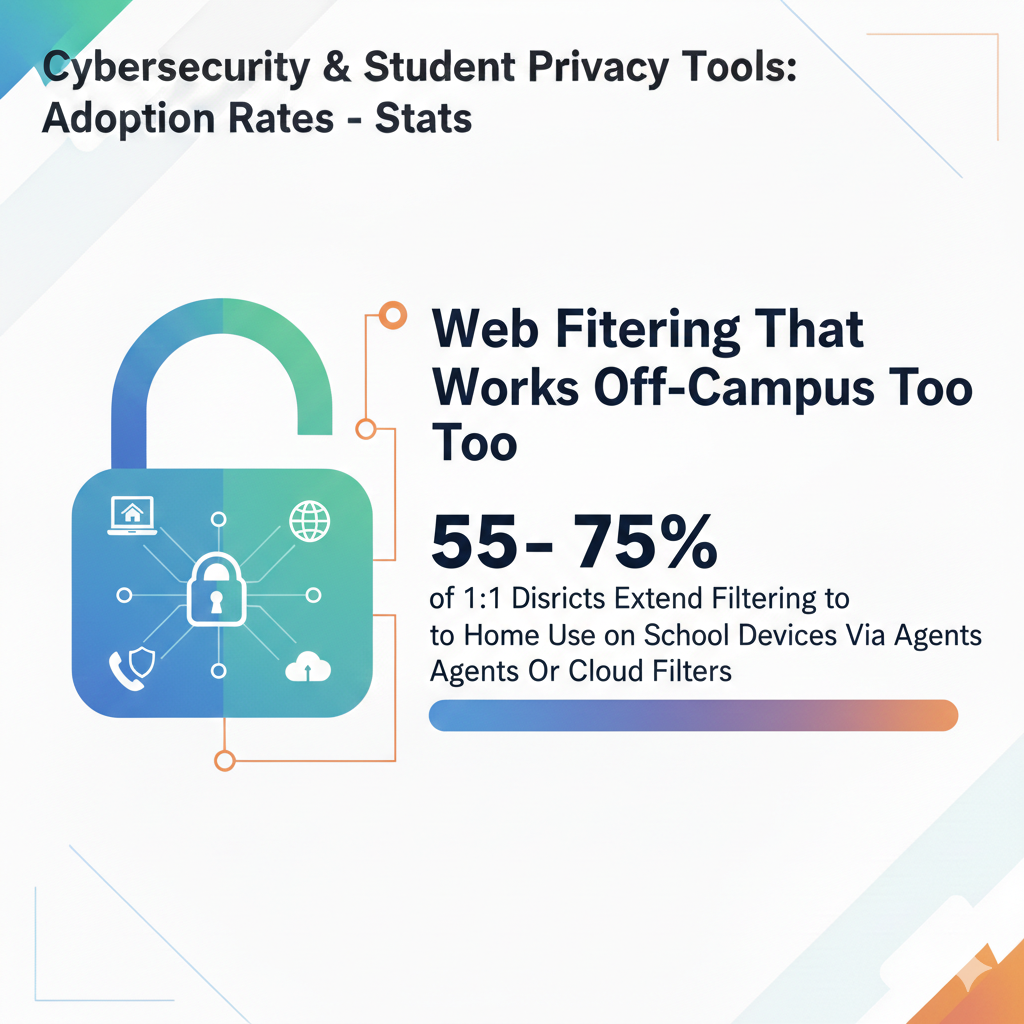
9) Web filtering that works off-campus too: Estimated ~55–75% of districts extend filtering to home use on school devices via agents or cloud filters
Why off-campus filtering matters now
When school devices go home, school risk goes home too. That is why 55–75% of districts extend filtering beyond campus. Students often do homework at night, on the same Chromebook or tablet used in class.
If filtering stops at the school door, students are exposed to more unsafe sites, and devices are more exposed to malware and scams. Also, if a device gets infected at home, it can bring that problem back into the school network.
How to extend filtering without upsetting families
First, clearly define what you are filtering and why. Families accept safety steps more easily when the school explains them in simple words. Focus on blocking harmful content and known threat sites, not policing normal browsing.
Second, use device-based filtering for school-owned devices. This keeps the rule simple: school device, school safety settings. Families can still use their own home devices under their own rules.
Third, set a “home mode” that respects family needs. For example, you might allow more general sites in the evening for older students, while still blocking clear harm. Keep the policy predictable, not random, so students do not feel tricked.
Fourth, build a strong support path. If a student cannot access a required research site at home, they need help fast. Provide a simple way to request an unblock and a clear time goal for response.
Off-campus filtering works best when it feels like a seatbelt. It is there to reduce harm, not to control everything.
10) Endpoint protection/EDR on staff laptops: Estimated ~65–85% of districts run endpoint security on staff machines to detect ransomware and suspicious behavior
Why staff devices need stronger protection
Endpoint protection, often called EDR, watches for signs of malware, ransomware, and strange behavior on a device. Staff laptops deserve special attention because they touch the most sensitive systems.
A teacher may open email attachments all day. An office staff member may download reports. An admin may log into finance tools. If a staff laptop is infected, it can be used to steal passwords, spread malware, or encrypt school files.
If about 65–85% of districts use endpoint security on staff machines, many are making progress. But the gap still matters. Attackers do not need every laptop. They need one.
Tactical steps to make EDR effective, not just installed
First, confirm that the tool is actually active on every staff device. Many schools have licenses but miss a batch of devices. Run a weekly device compliance report and follow up on missing agents.
Second, tune the alerts. If the tool screams about harmless events all day, the team will stop looking. Start by focusing on the highest risk alerts: ransomware patterns, credential theft tools, suspicious PowerShell use, and unknown persistence behavior. Then expand.
Third, decide who responds and how. When an alert hits at 9:00 a.m., do you isolate the device right away? Who calls the teacher? Who checks if student data was touched? Write this as a short playbook. Keep it clear enough that a substitute IT staff member could follow it.
Fourth, pair EDR with safe user habits. EDR is not a magic shield. Keep admin rights limited. Teach staff to treat unexpected attachments as risky, even if the email looks like it came from a colleague.
Finally, test it. Run a safe simulation with your security provider or internal team. Make sure the tool detects and blocks. A tool you have never tested is a tool you do not truly trust.
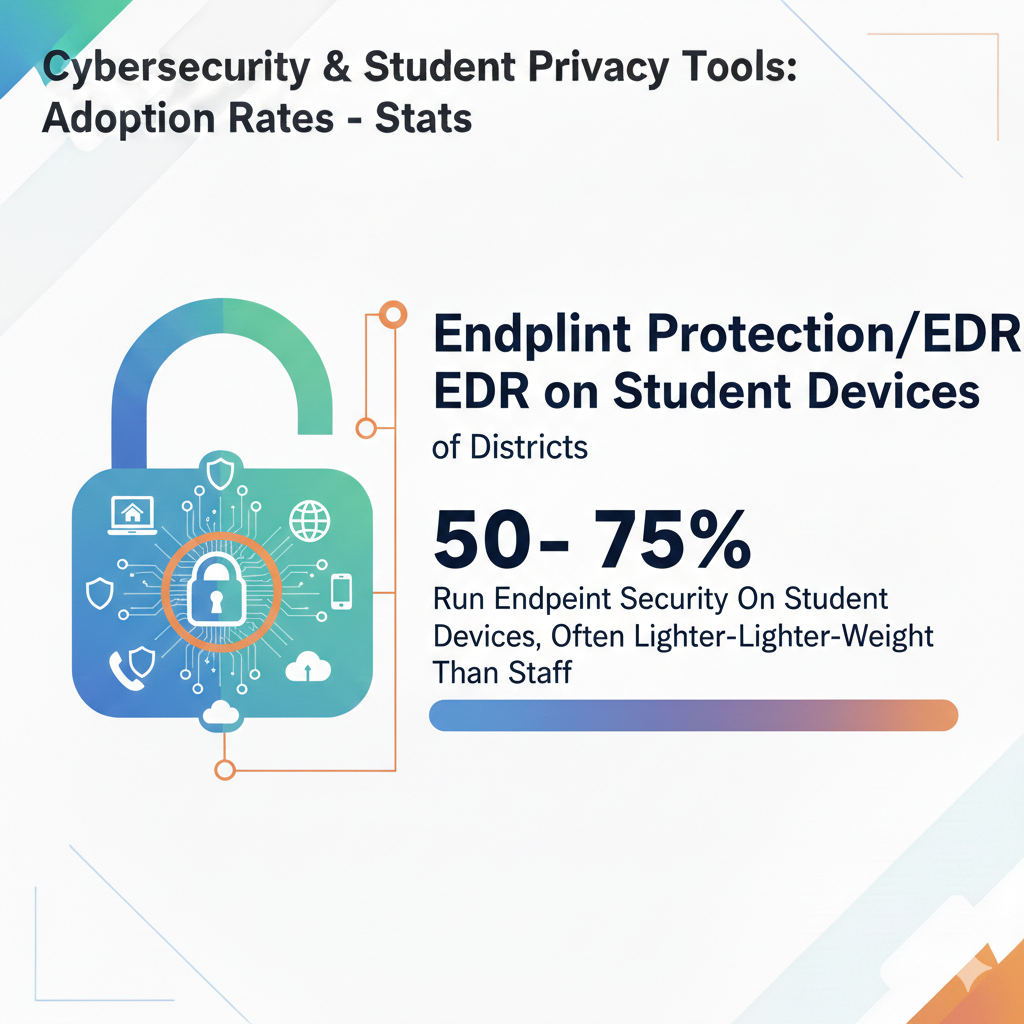
11) Endpoint protection/EDR on student devices: Estimated ~50–75% of districts run endpoint security on student devices, often lighter-weight than staff
Why student devices are still a real entry point
Student devices face different risks. They visit many sites, click many links, and install extensions if allowed. Even if students do not have access to finance systems, their devices can still carry malware into the school network or become a stepping stone to staff accounts.
Also, student devices often store classwork, which can include personal details. That makes them worth protecting.
If about 50–75% of districts run endpoint security on student devices, many schools are balancing safety with performance. Student devices may be lower power, so the tool must be lightweight.
How to protect student devices without slowing them down
Start by choosing controls that match student reality. Focus on blocking known malware, preventing risky downloads, and detecting browser-based threats. If your devices are Chromebooks, choose protections built for that environment rather than forcing heavy tools designed for corporate laptops.
Next, link endpoint tools to your device management system. That way you can confirm coverage, push updates, and remove risky extensions from one place. If the endpoint tool sees a threat, it should be able to quarantine it and report it quickly.
Also, set clear privacy boundaries. Students and families should know what is being monitored. Most schools do not need to watch every keystroke or track personal browsing beyond safety needs. Keep monitoring focused on threats, not personal behavior.
Then build a simple response plan. If a student device gets flagged, isolate it from the network, notify the family, and offer a fast fix. The faster you handle it, the less disruption to learning.
Finally, reduce the need for EDR by limiting permissions. If students cannot install random apps or extensions, many threats never start. This is one of the best “quiet wins” in school security.
12) Automatic patching for district-owned Windows/macOS devices: Estimated ~50–70% of districts have centralized patch management; the rest patch inconsistently or manually
Why patching is one of the biggest risk reducers
Patching means updating software to fix known flaws. Many attacks do not need clever tricks. They use old bugs that already have fixes. If only about 50–70% of districts have centralized patch management for Windows and macOS, a large group is still relying on chance.
Manual patching fails for predictable reasons. Devices are off. People postpone restarts. A laptop sits in a drawer for weeks.
In school terms, unpatched devices are like doors with broken locks. You might not notice until someone tries them.
How to build a patch system that staff can live with
First, set a routine. Choose a weekly patch day and a clear window. For example, push updates after school hours and require a restart by the next morning. Make the message simple: updates protect student data and keep devices working.
Second, track compliance. Use your management tools to see which devices are behind. Do not rely on “we pushed it” as proof. You need “it installed” as proof. Create a gentle escalation path. First reminder, then limited access for devices that fall far behind, then direct support.
Third, handle “break risk” with a staged rollout. Patch a small group of test devices first, then expand to staff, then to the full fleet. This reduces the chance a bad update disrupts a whole school day.
Fourth, include third-party apps. Many breaches come from old browsers, PDF readers, or utility tools. Your patch program should cover these too, not only the operating system.
When patching becomes a habit instead of a scramble, you reduce risk and also reduce help desk pain.
13) Regular vulnerability scanning (at least quarterly): Estimated ~35–55% of districts run recurring vulnerability scans to find outdated software and misconfigurations
What vulnerability scanning catches that humans miss
Vulnerability scanning is like a safety inspection for your network and systems. It looks for known weak points, such as outdated software, open ports, weak settings, and exposed services. If only about 35–55% of districts scan at least quarterly, many schools are still working blind.
Even strong teams miss things because school tech stacks are large and always changing. A new server goes online. A staff member turns on remote access for a quick fix. A forgotten test system stays exposed.
Scanning turns “we think we are safe” into “we can see what is risky.”
How to start scanning without drowning in alerts
Begin with a clear scope. Start with your most important assets: the systems that handle student records, staff email, finance tools, identity systems, and your public-facing website. Scan those first. Then expand to the rest of the network and device groups.
Next, treat the results like a triage list, not a shame list. Focus on high-severity issues that are easy to fix. Outdated critical software, weak remote access settings, and exposed admin panels should rise to the top. Set simple targets, like fixing critical findings within two weeks and high findings within one month.

Also track ownership. Every finding should have a clear owner. If “everyone” owns it, no one fixes it. Assign it to a person or a team, set a due date, and follow up.
Make scanning routine. Quarterly is a minimum. Monthly is better if your environment changes often. After major changes, scan again. If you migrate a system, add a new vendor, or change firewall rules, scan.
Finally, do not forget reporting. Share a short, simple summary with leadership. Show the top risks and the progress trend. When leaders see improvement, they support more time and budget. Scanning becomes a steady safety practice, not a panic after an incident.
14) Email security gateway (anti-phishing/anti-spam): Estimated ~70–90% of districts use dedicated filtering beyond basic inbox rules
Why email is still the main attack path
Email is the most common way attackers enter schools. Phishing emails can look like messages from a principal, a vendor, or even a parent. They can carry links that steal passwords or attachments that install malware. That is why 70–90% of districts use an email security gateway.
It can block known bad senders, scan attachments, rewrite links, and flag suspicious messages.
But email filters are not perfect. Attackers adapt. They use clean domains, they compromise real accounts, and they write messages that look human. So the gateway must be paired with smart settings and user habits.
How to improve email protection in a practical way
Start by tightening inbound rules for high-risk file types and risky patterns. Block executable attachments. Flag external emails clearly, so staff can see when a message comes from outside the district. Use link scanning, so staff do not land on known phishing pages.
Next, protect the highest risk staff first. Finance teams and principals are top targets. Apply stricter controls for them, like higher sensitivity on suspicious messages and stronger quarantine rules.
Then create a simple “report phishing” button in the email client. Reporting should take one click, not a long process. When staff report, the IT or security team should respond with a short note: was it real, and what should staff do next? This builds trust and habits.
Also watch outbound email. If an attacker compromises an account, outbound scanning can detect unusual sending patterns and stop the spread. This protects your community and your reputation.
Finally, test your filters with safe simulations and measure results. If staff still click risky links often, your training needs work. If many safe emails get blocked, your rules need tuning. The goal is balance: strong blocking with minimal disruption.
15) DMARC/SPF/DKIM configured for school domains: Estimated ~45–65% of districts enforce domain protections to reduce spoofed “principal” or “IT” emails
What these protections do in simple words
DMARC, SPF, and DKIM are email domain protections. They help prevent someone from sending an email that looks like it came from your school domain when it did not. Without them, an attacker can send a message that seems to be from a principal, HR, or IT and trick staff into sharing passwords or paying fake invoices.
If only about 45–65% of districts enforce these protections, a lot of schools still allow easy spoofing. That is a big risk because spoofed emails feel “trusted” at first glance.
How to roll out domain protection safely
Start with an inventory of all systems that send email using your domain. This includes your main email system, your SIS, your attendance tool, your cafeteria payment system, and any third-party platforms that send parent messages. If you miss one, you may accidentally break real emails when you enforce strict rules.

Next, begin in monitoring mode. DMARC lets you observe who is sending email as your domain. Review those reports. Fix any systems that are not properly authenticated. This step takes patience, but it prevents disruption.
Then move to enforcement in stages. First, use a “quarantine” policy, where suspicious emails go to spam. After you confirm it works, move to “reject,” where spoofed emails are blocked completely. This staged approach reduces risk and avoids sudden chaos.
Also communicate with staff. Tell them the school is tightening domain security and remind them that external spoofing will drop. That is good news, but it does not remove the need for caution.
When these protections are in place, you cut a large class of phishing attacks. It is one of the most effective changes you can make, and it works quietly in the background every day.
16) Security awareness training for staff (at least annually): Estimated ~60–80% of districts provide training; fewer make it interactive or run frequent refreshers
Why annual training is not enough by itself
If about 60–80% of districts provide at least yearly security training, that is a strong start. But once-a-year training often fades fast. Staff get busy. New threats appear. Attackers change their style. So the real gap is not only whether training exists, but whether it becomes a living habit.
Staff are the front door of the school’s digital world. A single click on a fake login page can hand over a password. A rushed reply to a “principal” email can leak private details. Training is not about blaming staff. It is about giving them calm, simple rules that work on a hard day.
How to make training short, useful, and real
Keep the main training plain and practical. Focus on the few moves staff must master: spotting fake login links, checking the sender carefully, handling attachments safely, and reporting suspicious messages fast.
Replace long theory with real examples from school life, like fake shipping notices, fake IT password reset messages, and urgent requests for gift cards.
Then add small refreshers during the year. Five minutes in a staff meeting once a month works better than one long session once a year. Use short stories: “Here is what happened in another district. Here is how it started. Here is what would have stopped it.”
Also train for student privacy, not only cyber threats. Staff should know what can be shared in email, what should stay inside approved systems, and how to store files safely. Simple rules help, like “no student IDs in open email” and “no sharing class lists in public links.”
Finally, make it easy to do the right thing. Provide a one-click “report phishing” tool. Provide short templates for safe parent communication. When safe behavior is the easiest behavior, adoption rises fast.
17) Phishing simulation tests for staff: Estimated ~30–50% of districts run mock phishing campaigns to measure real-world risk
Why practice beats lectures
Phishing simulations are safe test emails sent to staff to see what people do. If about 30–50% of districts run these, many schools still skip the most effective learning method: practice.
Simulations show real behavior, not what people say they will do. They also help you see which departments are under the most pressure, which messages are most tempting, and which training topics need help.
This is not about catching people. It is about finding weak spots before an attacker does.
How to run simulations in a fair, helpful way
Start gentle. Use simple scenarios that teach one lesson at a time. For example, a fake “password expires today” message teaches staff to avoid clicking and to use the official login path instead. Avoid scary or personal themes. Keep it respectful.

Then give instant coaching. If someone clicks, show a short page that explains what clues they missed. Keep the tone calm. No shame. The goal is learning.
Measure the right things. Do not only track clicks. Track reports. When more staff use the “report phishing” button, that is a major win. Celebrate that publicly.
Also tune simulations to your environment. If your district uses Google Workspace or Microsoft 365, test the same kinds of fake pages staff see in real attacks. Rotate themes so people learn patterns, not one message.
Finally, use results to improve systems, not just people. If many staff fall for a fake login page, strengthen MFA and domain protections. If many staff open attachments, tighten attachment controls. Simulations should guide smarter security choices, not just more training.
18) Central log monitoring/SIEM: Estimated ~20–40% of districts aggregate logs into a SIEM; many rely on basic logs only, which slows investigations
What a SIEM does for a school
A SIEM collects logs from many systems into one place. Logs are the “footprints” of what happened: logins, file access, device alerts, firewall events, and more. If only about 20–40% of districts use a SIEM, most schools still struggle to answer basic questions during an incident, like “Which account was used first?” or “Where did the attacker go next?”
Without central logs, teams spend hours pulling data from many tools, often after logs have expired. That delay can increase damage.
How to build log monitoring without a huge team
Start by deciding what you must log first. Focus on identity systems, email, the SIS, device management, endpoint security, and firewall logs. These sources tell the clearest story during a breach. Send them to one place with enough storage to keep at least a few months of history, longer if possible.
Then define a small set of alerts that matter. Too many alerts will drown you. Begin with high-signal events: many failed logins, logins from unusual places, new admin accounts created, mass file downloads, and disabled security tools. These are common signs of compromise.
Assign ownership. Who watches alerts? Who responds? If you do not have staff for 24/7 coverage, set “office hours” monitoring and pair it with an external partner for after-hours, or at least set strong automated actions for the most severe events.
Finally, practice. Run a tabletop exercise where you pretend a staff account is compromised. Use logs to answer key questions. This builds real confidence and reveals gaps before a real incident forces the lesson.
19) 24/7 managed detection & response (MDR) support: Estimated ~15–30% of districts have round-the-clock monitoring via an external provider
Why 24/7 matters more than most people think
Cyberattacks do not follow school hours. Many ransomware groups strike late at night, on weekends, or during holidays, because response is slower. If only about 15–30% of districts have 24/7 MDR support, most schools are still exposed during the hours when no one is watching. Even the best internal IT team cannot stare at alerts all day and all night.
MDR is like having a security guard for your digital campus. The guard watches alarms, checks what is real, and helps respond fast.
How to make MDR affordable and effective
Start by being clear about what you want the MDR team to monitor. The most valuable feeds are endpoint security alerts, identity logs, email security signals, firewall events, and cloud platform logs. If the MDR partner only watches one tool, you will miss important clues. Ask them what they can ingest and how quickly they can act.

Next, define response rules. When should they isolate a device? When should they disable an account? Who do they call first, and what is the backup contact? If your MDR team sees a ransomware pattern, you want fast action without confusion. Write these steps down in simple language.
Also set expectations about reporting. You need short weekly summaries and clear incident notes. If reports are too technical, leaders will ignore them. Ask for plain-language risk summaries that you can share with principals and district leaders.
Finally, practice a live drill with the MDR partner. Run one scenario where a staff laptop is infected, and another where a staff account is compromised. If the partner responds slowly or unclear, fix the plan now, not during a crisis.
20) Backups that are offline/immutable (ransomware-resistant): Estimated ~35–55% of districts have protected backups that attackers can’t easily delete or encrypt
Why normal backups can fail when you need them most
Many schools think they have backups, but ransomware attackers often delete or encrypt backups too.
That is why offline or immutable backups matter. “Offline” means disconnected from the network. “Immutable” means the data cannot be changed for a set period, even by an attacker using stolen admin credentials. If only about 35–55% of districts have ransomware-resistant backups, many schools still have a false sense of safety.
Backups are your last safety net. If that net has holes, recovery becomes slow and expensive.
How to build safer backups in steps
Start with the “3-2-1” mindset: multiple copies, different storage types, and at least one copy kept away from the main environment. You do not need fancy words. You need separation. Make sure the backup system does not share the same admin accounts as daily systems.
If attackers steal one set of credentials, they should not get everything.
Next, choose what must be protected first. Student information, staff HR data, finance systems, shared drives with student work, and core server configurations are top priorities. Back up what you cannot easily rebuild.
Then set immutability windows that match your risk. Many schools aim for at least a few weeks of protected backup history. If ransomware sits quietly for days before striking, you need clean restore points from before the attack.
Also protect cloud data. Many schools assume cloud platforms “handle backups,” but recovery needs vary. Make sure you have a clear plan to restore email, files, and class resources.
When you have offline or immutable backups, you are not only safer. You are also calmer. You know you can recover.
21) Backup restore tests (at least twice a year): Estimated only ~25–45% of districts regularly test restores; many discover issues only during an incident
Why “we back up” is not the same as “we can restore”
This stat is one of the most important. Only about 25–45% of districts test restores regularly. That means many schools do not know if their backups actually work. Backups can fail silently. Files can be incomplete. Restore steps can be unclear. Passwords for backup consoles can be lost. During an incident, this turns into panic.
A restore test is the proof that your safety net holds weight.
How to run restore tests without disrupting school
Start small. Pick one system and one type of data each test. For example, restore a sample of student files, then restore a test copy of the SIS database, then restore a staff laptop image. Rotate through your critical systems over the year.
Test both speed and accuracy. How long does it take to get back online? Are the restored files complete? Do permissions work? Can staff log in? These details matter because a “partial recovery” can still block school operations.

Document the steps in plain language. Write the restore process so a different team member could follow it. During a real incident, you may not have your best expert available.
Also test the “clean room” approach. In a ransomware event, you do not want to restore into an environment that is still infected. Have a plan for building a safe recovery zone and restoring there.
Finally, share results with leadership. When leaders understand restore time goals and the progress you are making, they support the tools and staffing that keep recovery real, not theoretical.
22) Network segmentation (separating student, staff, and servers): Estimated ~30–50% of districts have strong segmentation; flat networks remain common and risky
Why segmentation stops “small fires” from becoming “big fires”
Network segmentation means you separate parts of your network so one compromised area cannot easily reach everything else.
Think of it like fire doors in a building. If a student device is infected, segmentation helps stop that problem from jumping to staff systems or servers that hold student records. If only about 30–50% of districts have strong segmentation, many schools still have “flat” networks where devices can talk to too much.
Flat networks are convenient at first, but dangerous later. Attackers love them because moving from one device to another becomes easy.
How to segment in a practical, school-friendly way
Start with the most basic separation: student Wi-Fi, staff Wi-Fi, and guest Wi-Fi should be on different networks. Then separate servers and admin systems from everything else. This alone can cut major pathways.
Next, set clear rules for what is allowed between segments. Students may need access to the LMS and certain learning tools, but they do not need access to file servers with staff HR documents. Staff may need access to printers and shared drives, but not to device management consoles unless they are IT.
Do not try to segment everything at once. Begin with a small pilot in one school building. Map what breaks, fix the rules, and expand. This reduces surprises.
Also protect “east-west” traffic, meaning traffic inside the network. Many schools focus only on the internet edge, but attackers often move inside. Use internal firewall rules, and where possible, limit device-to-device traffic.
Finally, document the design in simple terms. When a new vendor system is added, your team should know which segment it belongs in. Good segmentation is not a one-time project. It is a habit of careful separation.
23) Guest Wi-Fi separated from internal systems: Estimated ~70–90% of schools isolate guest networks from SIS, HR, finance, and staff resources
Why this is one of the simplest, highest-value moves
Guest Wi-Fi is for visitors, events, and personal devices. If it touches internal systems, it becomes a wide-open gate. That is why 70–90% of schools isolate guest Wi-Fi. It is one of the easiest protections to explain and one of the easiest to justify.
Guests should be able to reach the internet, not your student record systems.
Still, many schools have edge cases that create risk. A “temporary” guest network becomes permanent. A staff member uses guest Wi-Fi to “fix” a connection issue. A vendor gets put on guest Wi-Fi but then needs access to an internal tool, so someone pokes a hole in the firewall.
How to keep guest Wi-Fi safe without making events harder
First, enforce a strict rule: guest Wi-Fi is internet-only. If a vendor needs internal access, give them a separate, controlled vendor network with limited routes and time-based access. Do not bend the guest network into something it was not built to be.
Second, rotate guest passwords or use vouchers for events. If the guest password is the same for years, it spreads everywhere. That makes it harder to track misuse.

Third, set bandwidth controls. Guest networks can get crowded during events. If guests consume all bandwidth, learning tools slow down. A simple cap keeps the school day stable.
Fourth, log basic connection events. You do not need invasive tracking, but you should know when a device connects, how long it stays, and roughly how much data it uses. If a problem happens, you need some trail.
When guest Wi-Fi is cleanly separated, you reduce risk quietly and keep school operations smoother.
24) Encryption on staff laptops (full-disk encryption): Estimated ~60–80% of districts enforce encryption to reduce data loss from stolen devices
What encryption protects against in real life
Full-disk encryption means that if someone steals a laptop, they cannot read the files without the right credentials. This matters because staff devices often contain email caches, saved documents, grades, reports, and sometimes exports from student systems.
Even if your online systems are strong, a stolen laptop with unencrypted storage can still leak sensitive data.
If about 60–80% of districts enforce encryption, many schools are doing the right thing. But the remaining group is still at risk, especially if staff devices travel between home and school.
How to enforce encryption without creating support pain
First, use your device management tools to check encryption status. Do not assume it is on. Make it measurable. If a device is not encrypted, flag it automatically and follow up.
Second, set a standard build process for staff laptops. New devices should ship with encryption already enabled. This prevents “we will do it later” delays. If you have mixed systems, choose the native encryption tools built into the operating system when possible, because they are stable and well supported.
Third, manage recovery keys safely. Encryption is only helpful if users can recover access when something goes wrong, but recovery must be controlled. Store recovery keys in a secure admin system with strict access controls. Avoid storing them in spreadsheets or shared folders.
Fourth, pair encryption with strong login rules. Encryption is not magic if the login password is weak and easy to guess. Use long passphrases and, where possible, MFA for critical access.
When encryption is enforced and monitored, a stolen laptop becomes an inconvenience instead of a crisis.
25) Encryption on student devices: Estimated ~50–70% of 1:1 device fleets have encryption enabled by default (especially Chromebooks and managed iPads)
Why student-device encryption is worth doing
Student devices hold more personal information than many people realize. They may store classwork drafts, downloaded assignments, cached logins, and sometimes offline files.
If a device is lost on a bus or stolen from a backpack, encryption helps ensure that whoever finds it cannot simply open the drive and read what is inside. That is why it matters that around 50–70% of 1:1 fleets have encryption on by default.
Encryption is also a trust signal. It tells families the school is serious about protecting student work and basic privacy.
How to increase encryption coverage without breaking learning
First, confirm what “encryption” means for your device types. Many Chromebooks handle encryption in a way that is tied to user sign-in. Managed iPads and other tablets have different controls. The key is to understand the default behavior and what settings you must enforce.
Second, use your device management system to check encryption status at scale. Spot checks are not enough. Build a report that shows which devices are compliant and which are not. Then fix the gaps in batches.
Third, set clear rules for local storage. Encourage cloud saving for schoolwork, and limit the need to store sensitive files locally. If a student downloads a file, it should still be protected, but the best approach is to reduce local risk where possible.
Fourth, make sure lost-device response is fast. Encryption is strong, but speed still matters. Have a simple way for families to report a missing device, and a clear process to lock it, wipe it if needed, and reset credentials.
Finally, pair encryption with safe login habits. If students share accounts or use weak passwords, encryption helps less. Use SSO, reduce password reuse, and teach simple routines like logging out on shared devices.
26) Data Loss Prevention (DLP) for student/staff files: Estimated ~15–30% of districts use DLP rules to detect sharing of sensitive info like student IDs or IEP data
Why DLP adoption is still low
DLP tools watch for sensitive information leaving approved places. For example, they can warn or block when someone shares a file publicly that contains student IDs, health details, or special education plans.
If only about 15–30% of districts use DLP, it often comes down to two reasons: setup feels complex, and schools fear blocking legitimate work. But the risk DLP addresses is very real. Many data leaks are not hacks. They are simple mistakes, like sharing a spreadsheet link with “anyone can view.”
DLP is best seen as a guardrail, not a punishment tool.
How to use DLP without creating chaos
Start with “alert-only” rules first. Do not block anything in the beginning. Create a few high-value detectors: student ID patterns, social security number patterns where relevant, special education keywords combined with names, and files marked as confidential. Let the system alert your admin team when risky sharing happens.
Next, focus on the most common leak path: public links. Set rules that flag files shared publicly or outside the district domain when they contain sensitive patterns. In many cases, the fix is simple: change sharing to “only within the school.”
Then, move from alerts to gentle blocks only for the highest-risk cases. For example, you might block public sharing of documents that include a student ID plus a full name. Keep everything else as “warn and allow with justification” so staff can proceed when there is a real need.
Also train staff using real examples. Show how easy it is to accidentally share a file the wrong way. Provide a safe sharing checklist in plain words. DLP works best when it supports good habits.
27) Role-based access controls for student records (least privilege): Estimated ~55–75% of districts use role permissions in SIS/LMS so staff only see what they need
What “least privilege” looks like in a school
Role-based access control means people only get the access they need for their job. A teacher may need to see their own classes, not the whole school. A counselor may need broader access, but still not finance or HR details.
If about 55–75% of districts use role permissions in the SIS or LMS, many are building smarter boundaries. Yet a large group still has overly broad access, often because it feels easier.
Broad access increases risk in two ways. It increases harm if an account is stolen, and it increases harm from honest mistakes, like viewing or sharing the wrong record.
How to tighten access without slowing staff work
Start by mapping roles. Keep it simple: classroom teachers, substitute teachers, office staff, counselors, school leaders, district admins, and IT. For each role, define what they must do day to day. Then set permissions to match those needs, not “just in case.”
Next, reduce “superuser” accounts. These accounts can do everything, so they are high-value targets. Limit them to a small set of trained staff and protect them with MFA and stronger monitoring.
Then, use “break glass” access for rare needs. Sometimes someone needs temporary broader access to solve a real problem. Provide a controlled way to grant temporary access for a short time, with logging and approval. This prevents permanent over-permissioning.
Also review permissions when staff move roles. A teacher becomes an administrator. A staff member changes schools. If their old access remains, risk grows quietly.
Finally, audit access with simple checks. Pick a random staff account each month and confirm their permissions match their job. This small habit catches drift early and keeps privacy protections real.
28) Annual review of who has access to student data systems: Estimated ~30–50% of districts do routine access reviews; many keep old accounts active too long
Why access reviews prevent silent privacy failures
Over time, school staff roles change constantly. People transfer schools, take leave, switch jobs, or leave the district. If access is not reviewed, old accounts stay active and permissions creep upward.
That creates a quiet risk: someone who no longer needs student data can still see it, and a forgotten account can be a simple way for attackers to get in. If only about 30–50% of districts do routine access reviews, many schools still rely on informal offboarding, which often misses edge cases.
Access reviews are not exciting, but they are one of the most direct ways to protect student privacy.
How to run access reviews without making them painful
Start with a short, fixed schedule. Do not try to review everything at once. Break it into quarterly cycles: SIS in one quarter, LMS in another, cloud drive sharing in another, and admin tools in another. If you spread the work, it becomes manageable.
Next, make the review list easy to read. Pull a report of users, roles, and last login dates. Sort by “high access” first. Look for accounts that have admin rights but have not logged in recently. Look for people assigned to the wrong school building.
Look for shared accounts. Shared accounts should be removed or replaced, because they destroy accountability.
Then align the process with HR changes. Whenever HR processes a termination or role change, that should trigger an automatic access review and access removal where needed. If HR and IT are not connected, gaps will remain.
Also, confirm that access removal is complete. Removing a user from the SIS is not enough if they still have access to cloud files or email archives. Make a simple checklist for offboarding and require completion.
Finally, keep a short record of reviews. Note what you checked, what you removed, and what you changed. This is useful for audits and also builds confidence with families.
29) Parent consent workflows for certain digital tools/data uses: Estimated ~25–45% of schools have a formal, trackable consent process (beyond paper notices)
Why consent must be trackable, not just “sent home”
Many schools still use paper notices for app use and data sharing. Papers get lost. Parents may not understand what they are signing. Schools cannot easily prove who consented and who did not.
If only about 25–45% of schools have a formal, trackable consent workflow, it shows a real gap in transparency and trust. Consent is not just a legal step. It is a relationship step. Families want to know what tools their children use and what data those tools collect.
A trackable process protects students, families, and schools.
How to improve consent in a clear, parent-friendly way
Start by choosing which tools need explicit consent. Focus on apps that collect personal details, create student profiles, use photos or voice, or store student work long term. Not every simple tool needs the same level of consent, but anything with identity data usually does.
Next, write consent language in plain words. Avoid legal phrases. Explain what the tool does, what data is used, why it is needed, and whether it is shared. Give parents a clear “yes” or “no” choice where required, and explain what happens if they choose no, such as an alternative assignment or tool.
Then make consent easy to complete. Use a secure digital form tied to the student roster. Parents should not need to print, sign, and return paper. They should be able to consent from a phone in under two minutes.
Also provide a place where parents can review decisions later. Trust increases when families feel in control. Keep the history, including the date and the tool name, and offer an easy way to change choices when policies allow.
Finally, connect consent to access. If a student does not have consent for a tool, the roster sync or login should not automatically provision that student in the vendor system.
30) Dedicated student privacy tool (data mapping / app inventory / privacy compliance platform): Estimated ~10–25% of districts use a specialized platform to track student data flows
Why specialized privacy tools are still rare
A dedicated student privacy platform helps districts track what apps are used, what data each app collects, where data is stored, who has access, and how long it is kept. It can also help manage DPAs, vendor reviews, and parent requests.
If only about 10–25% of districts use these platforms, it often comes down to cost, staffing, or the belief that spreadsheets are “good enough.”
But when districts manage dozens or hundreds of apps, spreadsheets break. They get outdated. They miss shadow apps. They cannot show real data flows. That is where specialized tools can bring order and clarity.
How to decide if you need a privacy platform, and how to use it well
Start by measuring your app sprawl. Count how many tools are in use across schools, not just what is officially approved. If the number is high and changing often, a dedicated platform can pay for itself through reduced risk and faster approvals.
Next, use the platform for three high-value wins first. One, build a real app inventory that includes who requested the tool and what grade it serves. Two, track DPAs and renewal dates so contracts do not lapse quietly.
Three, map data elements so you know which tools collect names, emails, IDs, and sensitive program data.
Then connect privacy work to daily workflow. If the platform is only used by one person once a month, it will fail. Link it to teacher app requests, vendor reviews, and IT provisioning. Make it part of the process, not an extra layer.
Finally, use the platform to improve transparency. When you can clearly explain what tools are used and why, families feel safer. And when trust rises, adoption of good tools becomes easier.
Conclusion
If you read through these 30 stats, one message becomes clear. Many schools are moving in the right direction, but most still have gaps that attackers and careless apps can use. The good news is that you do not need to fix everything at once.
The safest districts are not the ones with the most tools. They are the ones with the clearest habits.