Math can feel scary sometimes. Numbers mix with letters, and suddenly it feels like the page is speaking another language. But here’s the thing—math is not trying to trick you. It just needs to be shown in a way your brain likes.
That’s where algebra tiles come in. They are small, colorful shapes that turn tricky algebra problems into something you can see and touch. Instead of trying to keep everything in your head, you can move pieces around, just like a puzzle.
With algebra tiles, you don’t just hear the math—you see it. You can hold it in your hands. And when that happens, the scary part disappears, and the “aha!” moments start showing up.
In this guide, I’m going to walk you through what algebra tiles are, how they work, and why they can change the way you feel about math forever. We’ll start simple, then slowly move into how you can use them to solve problems step-by-step.
What Algebra Tiles Are and How They Work
Imagine you’re trying to understand a math problem, but the numbers and letters feel like they’re floating around in space. You can’t grab them, you can’t move them, and you can’t see how they fit together.
Now imagine those numbers and letters are turned into colorful tiles that you can pick up and arrange on your desk. That’s exactly what algebra tiles do.
What They Look Like
Algebra tiles are small, flat pieces, usually made of plastic or cardboard. They come in different shapes and colors. Each shape stands for something in algebra:
- Small squares – represent the number 1 (we call these “unit tiles”).
- Rectangles – represent “x” (a variable).
- Big squares – represent “x²” (x times x).
The colors usually help you tell positive and negative values apart:
- One color for positive numbers (often green or blue).
- Another color for negative numbers (often red or yellow).
Why They Help
When you see an equation on paper, it’s flat and abstract. But with tiles, you can move the pieces around. You can see how parts combine, cancel out, or balance each other.
Think about it like Lego: instead of imagining how blocks fit together, you just pick them up and snap them into place. That’s what makes algebra tiles powerful—they turn invisible math into something you can touch.
The Big Idea
Algebra is all about patterns and balance. The tricky part is seeing those patterns in your mind. Algebra tiles give you a shortcut: you literally arrange the pieces until they make sense.
For example:
If you have one green rectangle (+x) and one red rectangle (–x), you can put them together and see they cancel each other out. No guessing, no mental gymnastics—just a simple visual match.
Understanding the Language of Algebra Tiles

Before we start solving problems, we need to get fluent in the “language” of algebra tiles. Think of each tile like a word, and when you arrange them, you’re forming sentences—except here, the sentences are math problems.
If you skip this part, you’ll feel lost later. But once you understand it, algebra will feel a lot less like guessing and more like building something with blocks.
1. Unit Tiles – The Small Squares
These are the smallest tiles, and they always represent the number 1.
- Green unit tile = +1 (positive one)
- Red unit tile = –1 (negative one)
If you place one green tile and one red tile together, they disappear from the equation—because +1 and –1 add up to zero. This is called a zero pair.
💡 Why this is important:
Zero pairs help you simplify problems. If you have both +1 and –1, you can remove them without changing the overall value.
2. x Tiles – The Rectangles
These are longer than the small squares and represent the variable x.
- Green rectangle = +x (positive x)
- Red rectangle = –x (negative x)
Just like the unit tiles, if you have one green rectangle and one red rectangle, they cancel each other out to zero.
📌 Real-life example:
If I have $x worth of chocolates and I give away $x worth, I now have zero chocolates.
3. x² Tiles – The Large Squares
These are the biggest tiles, and they represent x × x, which is written as x² (“x squared”).
- Green large square = +x² (positive x squared)
- Red large square = –x² (negative x squared)
If you place one green large square and one red large square together, they also cancel to zero.
📌 Why this matters:
When we deal with quadratic equations later, you’ll see that removing matching positive and negative x² tiles is the fastest way to simplify the problem.
4. The Cancellation Rule (Zero Pairs)
This is the single most important thing to remember with algebra tiles:
Positive + Negative of the same type = 0
So:
- (+1) + (–1) = 0
- (+x) + (–x) = 0
- (+x²) + (–x²) = 0
If you spot a zero pair, you can take it out of the problem right away—just like crossing out matching terms in written algebra.
5. The “Balance” Mindset
In algebra, the left side of the equation must always equal the right side. Using tiles makes this “balance” visual. If you remove a tile from one side, you must also remove the same tile from the other side.
📌 Example:
If you have +x on both sides of an equation, you can remove one +x from each side, and the equation is still balanced.
Using Algebra Tiles for Basic Operations
Now that you know what each tile means, it’s time to see how they behave when we add, subtract, or multiply them. These basic moves are the foundation for solving bigger problems later.
Think of this section like learning how each chess piece moves before you start playing a full game.
1. Adding with Algebra Tiles
Adding is simple—you just put all the tiles together and see what you have.
Example 1:
(+x) + (+x) = 2x
Using tiles:
Place one green rectangle for +x, then place another green rectangle for +x. You now have two green rectangles—so you say 2x.
Example 2:
(+x) + (–x) = 0
Using tiles:
Place one green rectangle (+x) and one red rectangle (–x). They cancel each other out (zero pair), so the result is zero.
2. Subtracting with Algebra Tiles
Subtracting means taking tiles away.
Example 1:
(+x) – (+x) = 0
If you have one green rectangle and you take away one green rectangle, you’re left with nothing.
Example 2:
(+x) – (–x) = +x + x = 2x
Here’s the trick: subtracting a negative is the same as adding a positive. With tiles, removing a red rectangle (–x) means you add a green rectangle (+x).
3. Multiplying with Algebra Tiles
Multiplication is a little more visual. You arrange tiles in a rectangle shape—length times width.
Example:
x × x = x²
Place one green rectangle vertically and another green rectangle horizontally. The overlapping space forms a green large square—this represents x².
📌 Signs Matter:
- Positive × Positive = Positive
- Positive × Negative = Negative
- Negative × Negative = Positive
So if one tile is red (negative) and the other is green (positive), the result will be red.
4. Why This Matters Before Equations
Most students get stuck on algebra because they can’t see what’s happening when we say “combine like terms” or “simplify.” With tiles, combining is as easy as grouping matching shapes and removing zero pairs.
Solving Equations with Algebra Tiles

Equations can feel confusing on paper because it’s easy to lose track of what’s happening on each side. But with algebra tiles, you can literally see the equation as a balance. If both sides match, the scale is even. If not, you move tiles around until they do.
Step 1: Build the Equation with Tiles
Let’s start simple:
Example:
x + 3 = 5
With tiles:
- Place one green rectangle (+x) and three green unit tiles (+1) on the left side.
- Place five green unit tiles (+1) on the right side.
Step 2: Keep the Balance
In algebra, whatever you do to one side, you must do to the other. This keeps the equation balanced.
Here, you want to get “x” alone.
- On the left side, you have +3. To get rid of it, you need to add –3 (three red unit tiles).
- But you can’t just do it on one side—you must also add –3 to the right side.
Step 3: Remove Zero Pairs
- On the left, the three green unit tiles and three red unit tiles cancel out.
- On the right, five green unit tiles and three red unit tiles leave you with two green unit tiles.
Step 4: Read the Answer
Now the left side has just +x, and the right side has +2.
So, x = 2.
A Slightly Harder Example
Equation: 2x – 4 = 6
With tiles:
- On the left: two green rectangles (+x) and four red unit tiles (–1).
- On the right: six green unit tiles (+1).
Steps:
- Remove the –4 from the left by adding +4 (green unit tiles) to both sides.
- Cancel zero pairs.
- Now the left has 2x, the right has 10.
- Split the 10 unit tiles into two equal groups—because 2x means two of the same thing.
- Each group has 5, so x = 5.
Why This Works So Well
With algebra tiles, you’re not memorizing “rules.” You’re moving pieces in a way that feels logical—because you can see the reason behind every step.
Advanced Problems with Algebra Tiles

Once you’re comfortable with simple one-step and two-step equations, it’s time to take on the trickier ones—negative numbers, variables on both sides, and even quadratic expressions. Algebra tiles make these much easier to follow.
1. Equations with Variables on Both Sides
Example:
x + 2 = 2x – 3
With tiles:
- On the left: one green rectangle (+x) and two green unit tiles (+1).
- On the right: two green rectangles (+x) and three red unit tiles (–1).
Steps:
- Remove +x from both sides by taking away one green rectangle from each.
- Now you have: 2 = x – 3.
- Remove –3 from the right by adding +3 to both sides.
- Cancel zero pairs on the right.
- You’re left with: 5 = x.
Answer: x = 5.
2. Equations with Negative Variables
Example:
–x + 4 = 1
With tiles:
- On the left: one red rectangle (–x) and four green unit tiles (+1).
- On the right: one green unit tile (+1).
Steps:
- Remove the +4 by adding –4 to both sides.
- On the left: 4 green tiles and 4 red tiles cancel out, leaving just –x.
- On the right: 1 green tile and 4 red tiles = –3.
- Now you have: –x = –3.
- Flip both sides (change the sign) to get x = 3.
3. Quadratic Examples with x² Tiles
Example:
x² + 3x + 2 = 0
With tiles:
- Place one large green square (+x²), three green rectangles (+x), and two green unit tiles (+1) all on one side.
- Your goal is to arrange them into a rectangle shape—this is called factoring.
Steps:
- Arrange the tiles into rows and columns so that the corner is x², the sides are x, and the corner units are +1.
- You’ll find they fit perfectly into (x + 1)(x + 2).
- This means the solutions to x² + 3x + 2 = 0 are x = –1 and x = –2.
📌 Why tiles make this easy: You’re not just guessing the factors—you can see them form right in front of you.
4. When Equations Look Messy
Sometimes you get something like:
–2x + 5 = –x – 3
With tiles:
- Get all the x tiles on one side by adding +2x to both sides.
- Get all the unit tiles on the other side by adding +3 to both sides.
- Simplify and divide if needed.
Tiles keep you from mixing up signs because you’re actually holding the positives and negatives in different colors.
How to Practice with Algebra Tiles at Home

Algebra tiles work best when you actually use them—not just read about them. The more you touch, move, and arrange them, the faster your brain will get used to seeing equations as puzzles you can solve.
Here’s how you can practice at home, even without fancy classroom sets.
1. Make Your Own Algebra Tiles
You don’t need to buy them—you can make them yourself in less than 20 minutes.
What you’ll need:
- Cardboard or thick paper
- Scissors
- Markers or colored pens
Steps:
- Cut small squares for +1 and –1 tiles (two different colors).
- Cut rectangles for +x and –x tiles.
- Cut large squares for +x² and –x² tiles.
- Use one color for positive values (like green or blue) and another for negative values (like red or orange).
Once you have these, you can start arranging them on a table just like in class.
2. Start with Simple Zero Pair Practice
Before jumping into full problems, get used to making and removing zero pairs.
Example game:
- Place random positive and negative tiles on the table.
- Challenge yourself to remove all zero pairs until nothing is left.
- See how fast you can do it.
This builds speed and accuracy.
3. Use Real-Life Examples
Instead of only solving textbook problems, create your own scenarios.
Example:
- You have 3 green rectangles (+x) and 2 red unit tiles (–1).
- A friend gives you 1 green rectangle and 2 green unit tiles.
- What do you have now?
By “playing” with them, you’ll start to understand adding and subtracting naturally.
4. Work with a Partner
If you can, practice with a friend, sibling, or parent. One person makes a problem with tiles, and the other solves it. Switch roles.
This is one of the fastest ways to build confidence because you’re both learning from each other’s strategies.
5. Slowly Move to Written Algebra
The real goal is to be able to do algebra without tiles someday.
So, after solving a problem with tiles, write down what you did as an equation. Over time, you’ll need the tiles less and less, but you’ll still see them in your head.
How Debsie Helps Students Learn Algebra Without Fear
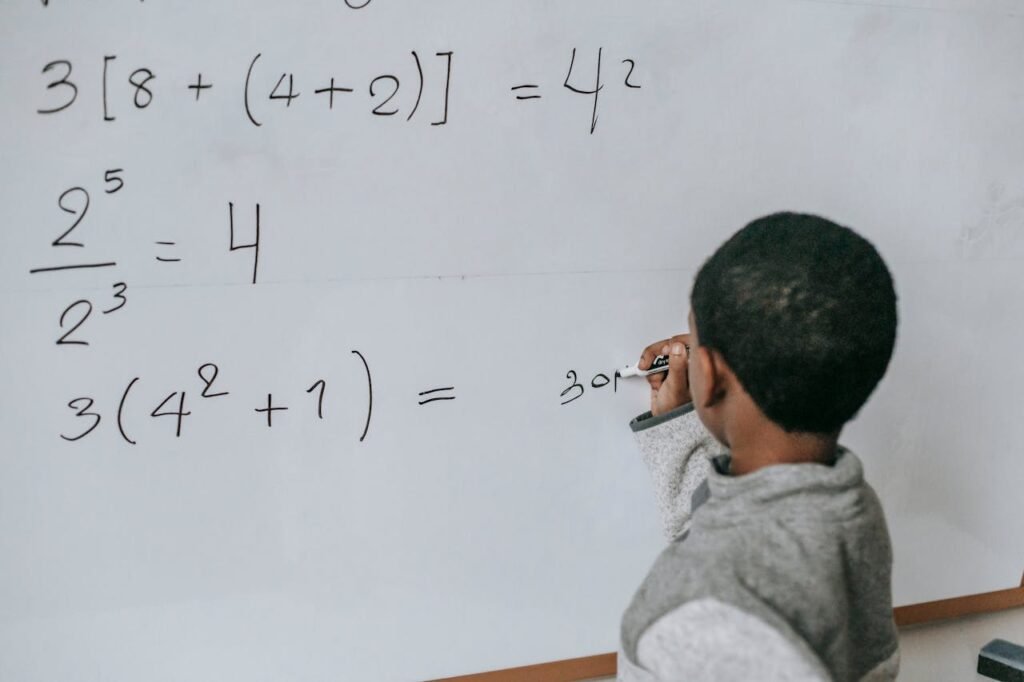
For many students, algebra feels like a mystery. Numbers suddenly have letters, equations get longer, and rules seem to appear out of nowhere. That’s when fear sets in—and fear can quickly turn into frustration.
At Debsie, we believe no student should feel lost in math. Instead, we make algebra a subject that feels clear, friendly, and even enjoyable. Our goal is simple: to turn that “I don’t get it” into “Oh, that makes sense!”—and we do it step by step.
1. Teachers Who Speak the Student’s Language
Our partner teachers don’t just know math—they know students. They understand the moment when a child’s eyes start to glaze over or when they’re just nodding to “look” like they understand. That’s the moment they slow down, use simpler words, or bring in a real-life example to make the idea click.
When we teach algebra with tools like algebra tiles, students can see the problem unfold like a puzzle. They’re no longer trying to imagine every step—they can touch it, move it, and understand it.
2. Active, Hands-On Learning
In many classrooms, math means listening and copying from the board. At Debsie, math means doing. Students move algebra tiles, rearrange shapes, and test ideas right there in the lesson. This hands-on method means the concept isn’t just memorized—it’s experienced.
3. Building Confidence, Not Just Skills
We know that math anxiety is real. So we celebrate small wins: getting one step right, finding a zero pair without help, or solving a problem faster than last time. These victories stack up, turning nervous students into confident problem-solvers.
4. Turning Practice Into Play
We use gamified learning to keep motivation high. Lessons include challenges, point systems, and “math missions” that make practice feel like an adventure instead of homework. Students often tell us they come back to class excited to see if they can “beat their score” from last time.
5. Making the Leap Beyond Tiles
Algebra tiles are a great starting point, but they’re just the beginning. As students grow more confident, we guide them into solving without tiles—so they can handle bigger, more complex problems while still imagining the steps clearly in their minds.
6. A Global, Supportive Learning Community
Debsie students come from over nine countries. This means a child in one part of the world might be solving the same type of problem as a child halfway across the globe. That sense of community keeps learning exciting and shows students that math is a skill they can share anywhere.
Conclusion
Algebra doesn’t have to be a wall that students run into—it can be a door they walk through with confidence. The secret is giving them the right tools and guidance so the numbers and letters stop feeling like strangers and start working together like old friends.
Algebra tiles are one of those tools. They take math out of the abstract and make it something you can see, touch, and play with. Once a student can physically build and rearrange an equation, the fear melts away, and the logic of algebra becomes clear.
At Debsie, we’ve seen it happen again and again—students who once said, “I’m just not good at math,” now saying, “I can do this!” And that shift doesn’t just help them in algebra; it changes the way they approach every challenge in life.
If you want to see that transformation in your child—or yourself—the first step is simple.
📌 Join our free trial class today at https://debsie.com/courses/ and discover how algebra can become one of the most empowering subjects you’ve ever learned.
Because when math makes sense, everything else gets a little easier.
Read next:
